
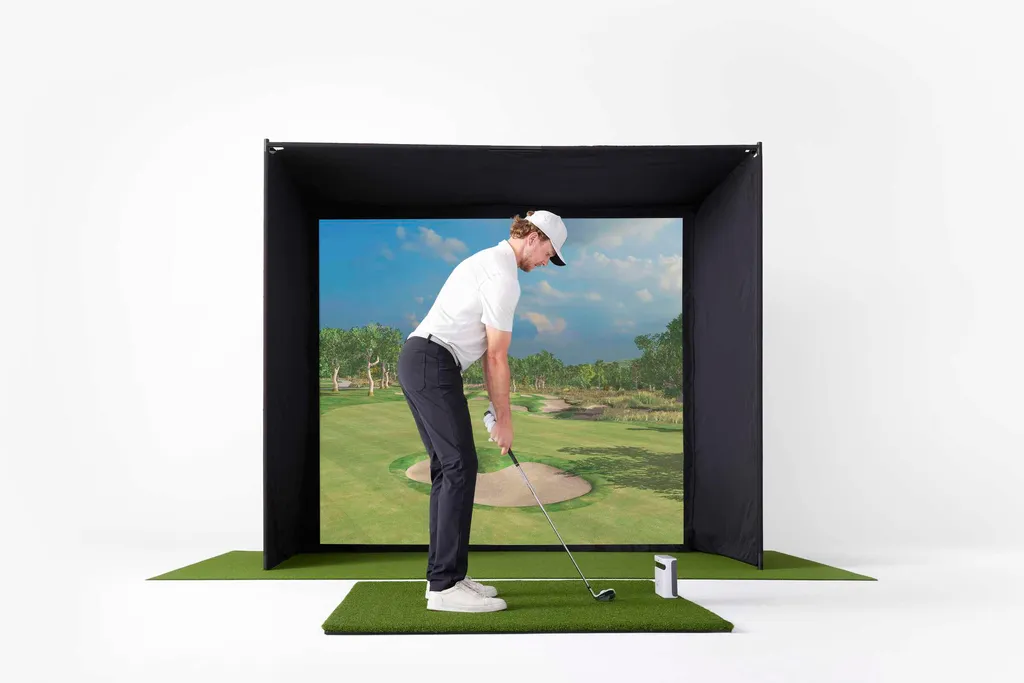
You have invested in a high-definition white impact screen, a premium 4K projector, and top-tier launch monitors. But when you fire up the system, the image looks a bit “washed out,” or worse;A mishit ball (a shank or sky shot) smashes into your metal ceiling frame with a deafening clang, bouncing back dangerously close to your face.
If this sounds familiar, your setup is missing the unsung hero of premium indoor golf enclosures: Black 3D Spacer Mesh.
Building a safe, immersive indoor golf studio requires more than just a white screen. Here is why adding black 3D mesh as a blackout backing and protective baffles is one of the smartest upgrades you can make for your simulator’s image quality and safety.
1. The Blackout Backing: Rescuing Your Contrast and Extending Screen Life
The Problem: "Washed-Out" Projection
To absorb the massive kinetic energy of a golf ball, high-quality white impact screens are woven with slight porosity. Because of this, they naturally let a small amount of light pass through. If your screen is set up in front of a white wall, a window, or in a brightly lit garage, that ambient light reflects back through the screen, severely diluting your projector’s contrast ratio and making the image look grey.
The Solution: Deep Contrast and Dual Durability
Hanging a layer of our Black 3D Spacer Mesh directly behind your main white screen acts as a highly effective Blackout Backing.
Visual Upgrade: The dark, matte texture absorbs light bleed, instantly deepening the black levels and making the virtual golf course colors pop.
Prolonged Lifespan: Beyond aesthetics, the black backing acts as a secondary shock absorber. By taking some of the blunt force off the main white screen, it significantly helps extend the lifespan of your more expensive projection surface.
2. Protective Baffles & Padding: Safety Meets Acoustic Dampening
The Problem: Dangerous Ricochets and Noise
Even the pros don’t hit the sweet spot every time. Hosel rockets, shanks, and sky shots happen. If an errant ball traveling at 150 mph hits the exposed EMT metal pipes of your enclosure frame or the hard ceiling, it creates a terrifyingly loud noise and poses a high risk of dangerous rebound.
The Solution: Shank-Proof Baffles
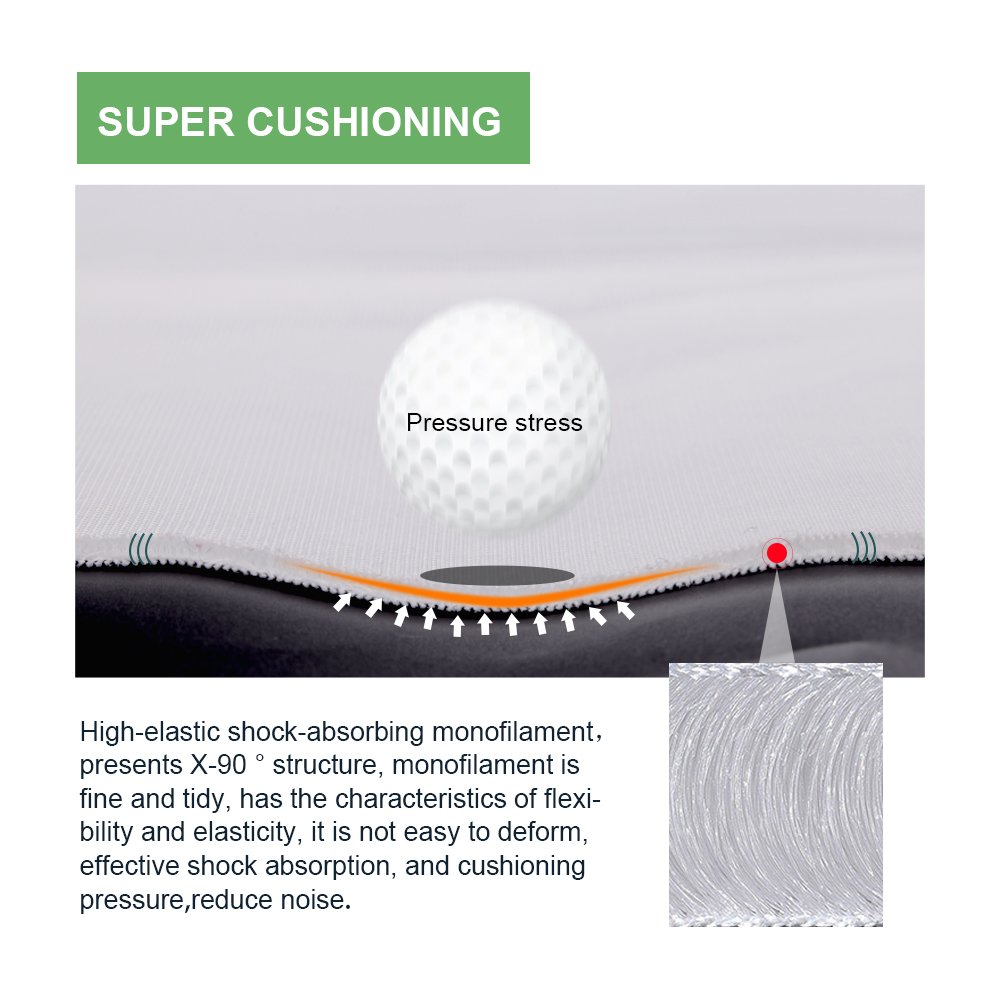
Standard black felt or cheap fabrics will tear or deform under this kind of pressure. Our Black 3D Spacer Mesh is engineered with an internal “air cushion” layer. When used as ceiling baffles, valances, or side enclosure walls, the 3D structure catches the errant ball, absorbs the kinetic energy, and encourages a safe “dead drop” straight to the turf.
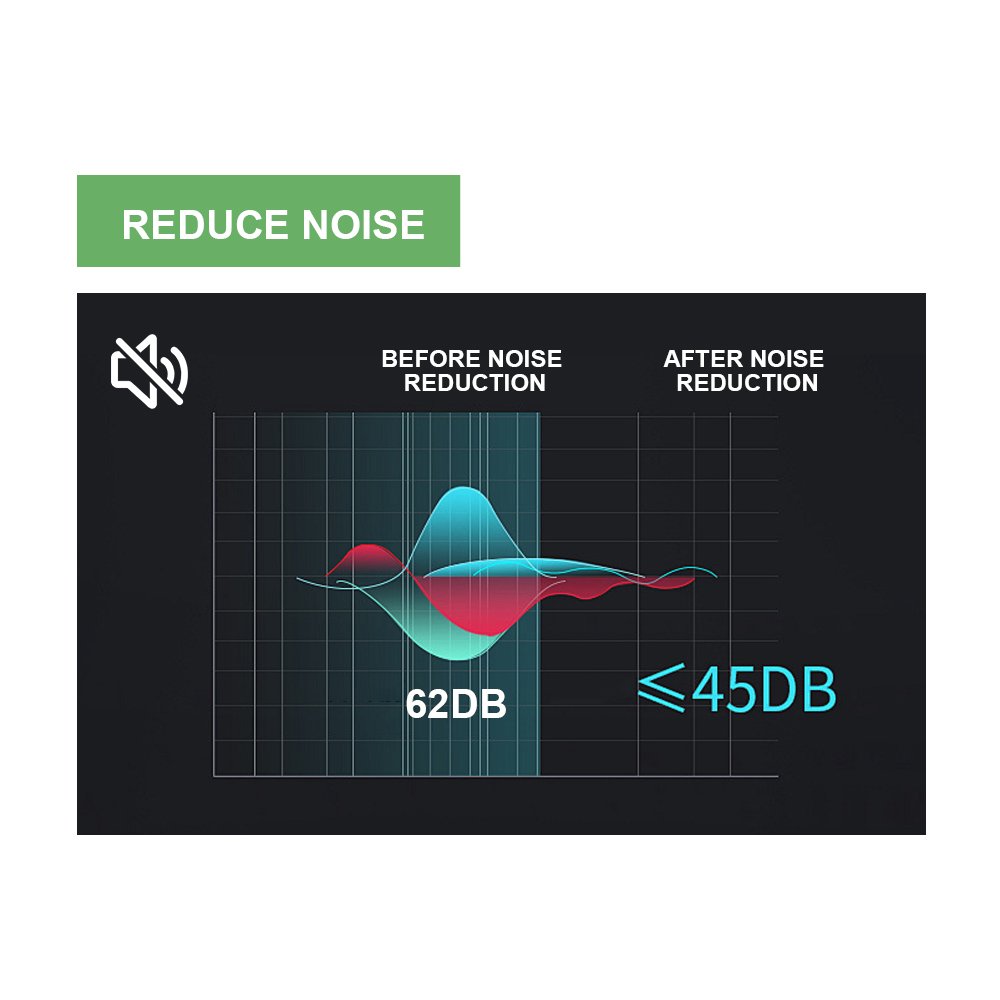
Additionally, the porous 3D structure is an excellent acoustic damper, helping to absorb room echoes and quiet the overall noise of your practice sessions.
3. Pro Installation Tips: How to Hang Your Mesh for Maximum Performance
Getting the material is only half the battle. How you install it makes all the difference. Here are three tips for DIY builders:
Tip 1: Find the “Sweet Spot” Spacing: When hanging your black backing behind the white screen, try not to pull them skin-tight against each other. Leave a small gap of about 1 to 2 inches (approx. 3-5 cm) between the two layers. This air gap maximizes both the sound dampening and the energy-absorbing “trampoline” effect.
Tip 2: Keep Baffles Loose (The Drape Effect): If you are installing black mesh baffles to protect your ceiling frame, do not tension them tightly. Use ball bungees to hang them loosely. A relaxed drape is far more effective at catching and slowing down a high-speed golf ball than a drum-tight surface.
Tip 3: Overlap Your Edges: To create a truly immersive, theater-like environment, ensure your side enclosure mesh slightly overlaps the edges of your main impact screen. This hides the bungee cords and prevents any distracting light leaks from the corners.
4. Why Choose Our Custom-Finished 3D Mesh?
Unlike raw fabric suppliers, our independent store offers Ready-to-Hang Finished Products. We take our commercial-grade Black 3D Spacer Mesh and finish it to your exact specifications:
Heavy-Duty Webbing: Reinforced borders that won’t rip under tension.
Precision Grommets: Strategically placed metal eyelets (grommets) making it incredibly easy to attach to your frame using standard bungee cords or zip ties.
Custom Velcro Options: Available upon request for seamless attachment to existing pads.
5. Frequently Asked Questions (FAQ)
Q: Do I really need a blackout backing for my golf simulator?
A: While not strictly mandatory, it is highly recommended. If your screen is in a bright room, or placed in front of a light-colored wall or window, a blackout backing is the most cost-effective way to drastically improve your projector’s image clarity and contrast.
Q: Can I use regular black bedsheets or cheap felt for my baffles?
A: We strongly advise against it. Regular fabrics lack the tensile strength and the energy-absorbing 3D structure needed to withstand high-velocity impacts. They are prone to tearing and do very little to prevent dangerous bounce-backs or reduce noise. Furthermore, it is not very satisfactory in terms of aesthetics.
Q: Will the edges of your finished baffles fray over time?
A: No. All of our custom-finished backing and baffle screens are constructed with heavy-duty perimeter webbing and double-stitched seams, specifically designed to withstand long-term, repetitive use without fraying.
6. Ready to Upgrade Your Enclosure?
Don’t let washed-out graphics and the fear of hitting your metal frame ruin your indoor golf experience. Finishing your enclosure with the right materials is the best investment you can make for your peace of mind.
